
How to Paint Kitchen Cabinets Like a Pro: Detailed 10-Step Process
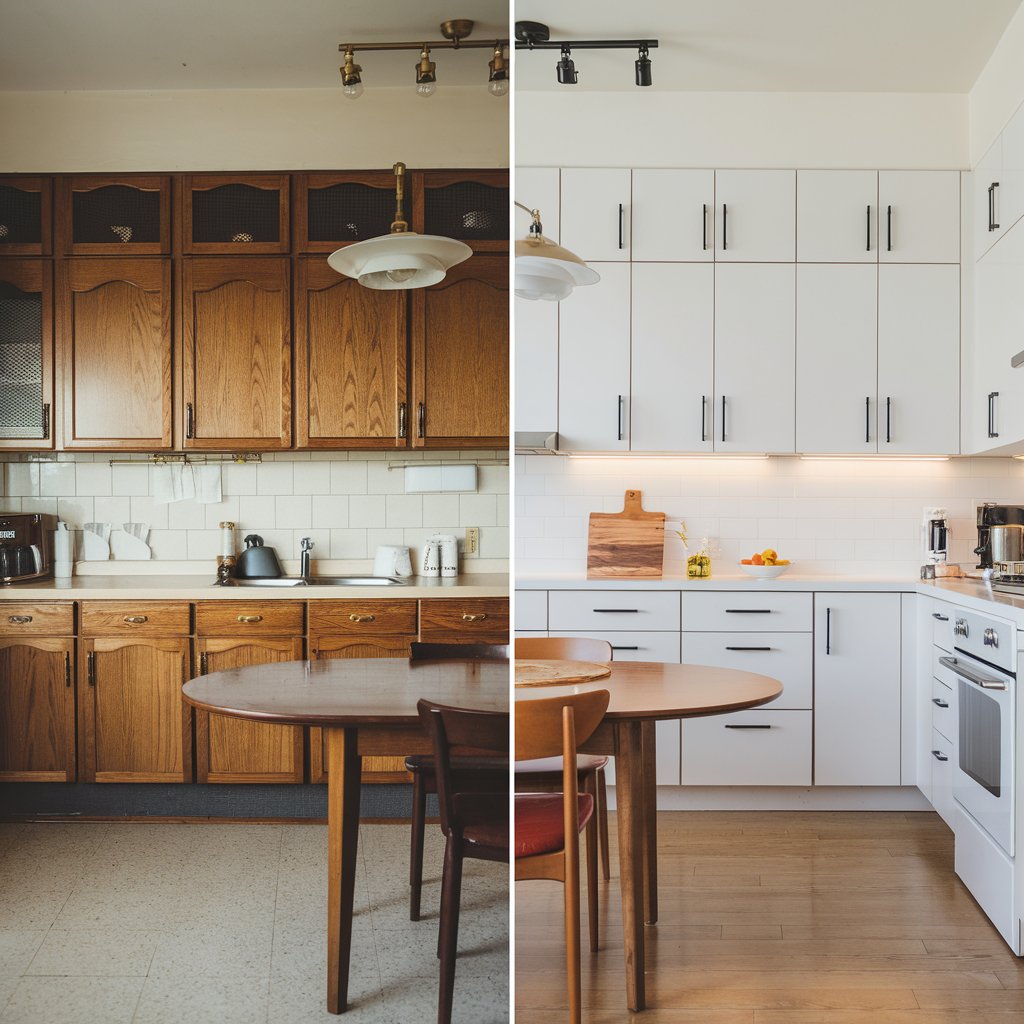
Are you dreaming of a kitchen transformation but cringing at the price tag of new cabinets? You’re not alone. With the average kitchen cabinet replacement costing between $5,000 and $15,000, many homeowners are turning to painting as a budget-friendly alternative that delivers stunning results.
When done correctly, painted kitchen cabinets can completely transform your space for just a fraction of replacement costs—typically between $200 and $600 depending on your kitchen size and material choices. The key phrase here is “when done correctly.”
After consulting with professional painters and testing various methods ourselves, we’ve developed this comprehensive, professional-grade guide to painting kitchen cabinets. This isn’t a quick weekend project (expect it to take about a week from start to finish), but the results can look factory-finished when you follow these detailed steps.
What You’ll Need: Complete Materials List
Before diving into your cabinet painting project, gather all necessary supplies. Using quality materials where it matters will significantly impact your final results.
Essential Tools:
- Screwdriver – For removing cabinet doors and hardware, See details
- Drill – For reinstalling hardware (optional but helpful), See details
- Painter’s tape – For protecting areas you don’t want painted, See details
- Drop cloths – To protect your floors and countertops, See details
- Sanding blocks or orbital sander – 120-grit and 220-grit, See details
- Tack cloth – For removing dust after sanding, See details
- Paint brushes – 2-inch angled brush for detail work, See details
- Small foam roller and tray – For smooth application on flat surfaces, See details
- Paint sprayer (optional) – For the most professional finish, See details
- Numbering system (optional) – Painter’s tape and marker for labeling doors, See details
Materials:
- Degreaser cleaner – TSP substitute works well
- Wood filler – For repairing any holes or damage
- High-quality primer – Specifically for cabinets (recommendations below)
- Cabinet paint – See recommendations below
- Clear topcoat (optional) – For extra durability in high-use kitchens
- New hardware (optional) – For a complete transformation
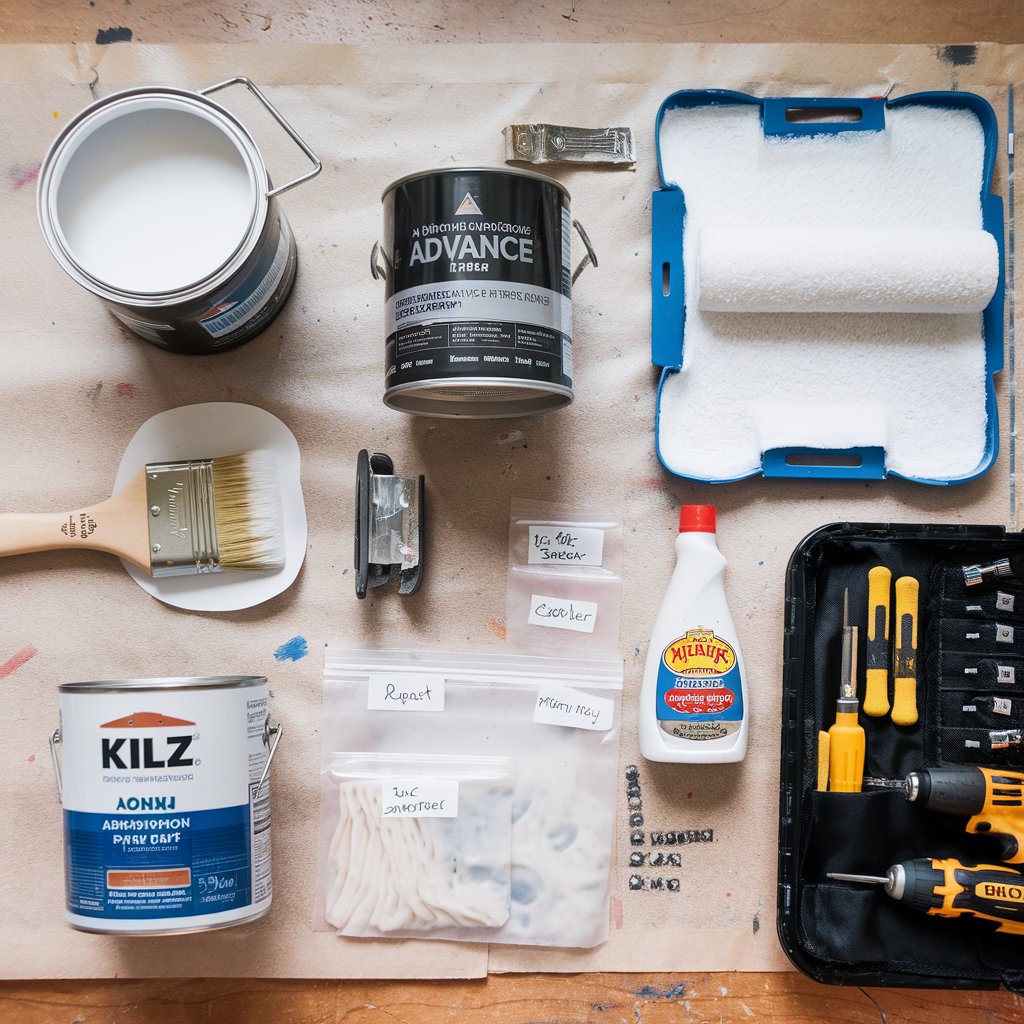
Recommended Products:
For the best results, we recommend these specific products that professional painters consistently use:
- Primer: KILZ Adhesion High-Bonding Interior Latex Primer ($40-45/gallon) or Zinsser B-I-N Shellac-Based Primer ($50-55/gallon) for the best adhesion
- Paint: Benjamin Moore Advance Interior Alkyd ($55-60/gallon), Sherwin-Williams ProClassic Alkyd Enamel ($60-65/gallon), or Cabinet Coat Urethane Acrylic ($45-50/gallon)
- Cleaner: Krud Kutter Original Cleaner/Degreaser ($8-10/quart)
- Topcoat (optional): General Finishes High Performance Water Based Topcoat ($25-30/quart)
The total investment for materials typically ranges from $200-300 for an average kitchen, significantly less than new cabinets while still achieving a high-end look.
Step 1: Assess Your Cabinets
Not all cabinets are suitable candidates for painting. Before starting, evaluate your cabinets to ensure they’re worth the effort.
Good candidates for painting include:
- Solid wood cabinets
- Wood veneer cabinets (if the veneer is in good condition)
- MDF (medium-density fiberboard) cabinets
Poor candidates include:
- Laminate cabinets (unless you use specialized products and techniques)
- Severely damaged cabinets with water damage or warping
- Very low-quality particleboard cabinets that are already falling apart
If your cabinets are in good structural condition but just outdated in appearance, they’re likely perfect for painting.
Step 2: Plan Your Kitchen Workflow
A cabinet painting project will temporarily disrupt your kitchen. Plan accordingly:
- Set up a temporary kitchen area elsewhere in your home
- Pre-cook meals or budget for takeout during the project
- Create a timeline allowing for drying time between coats
- Plan for ventilation, especially if using oil-based products
Most homeowners find that the project takes about 5-7 days from start to finish, including drying time. Rushing the process is the most common reason for poor results, so patience is essential.
Step 3: Remove Cabinet Doors, Drawers, and Hardware
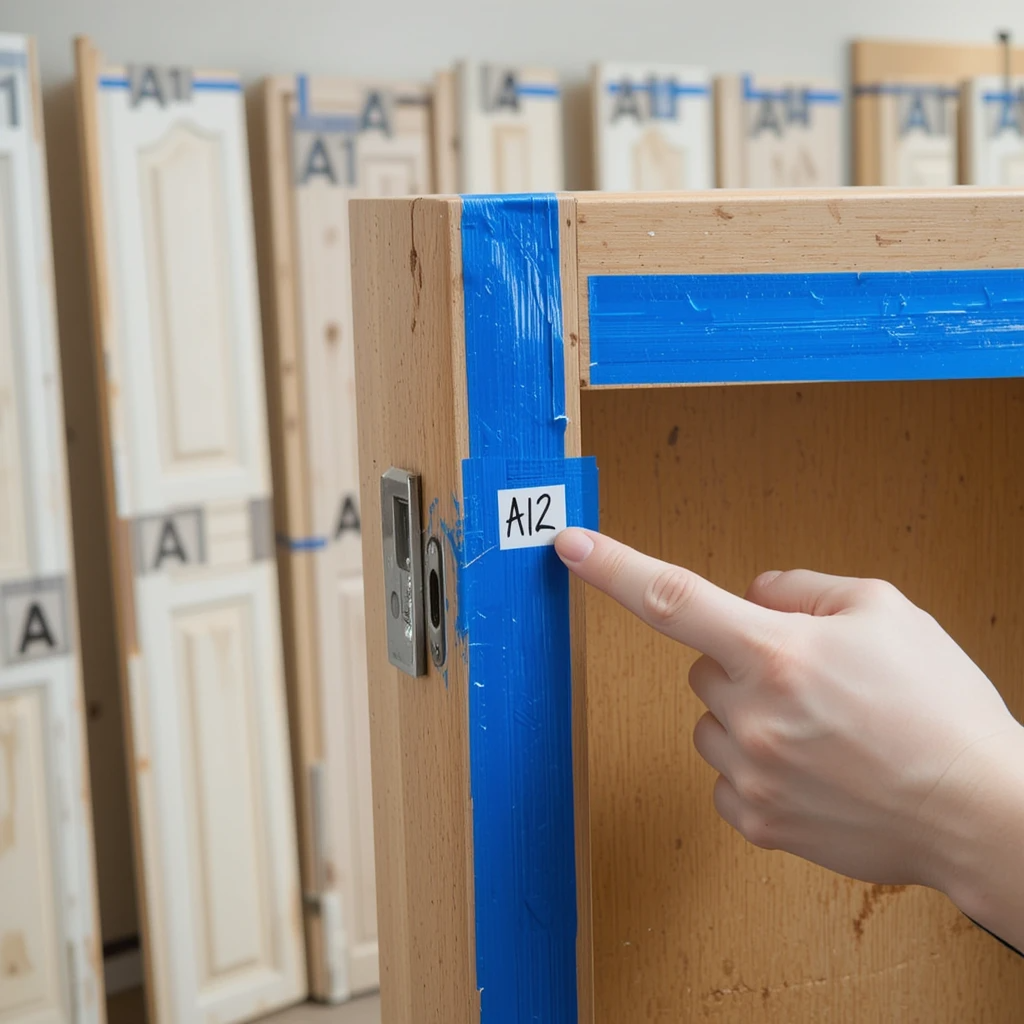
This step is crucial for a professional finish. Working with cabinets in place is a recipe for drips, uneven coverage, and a result that screams “DIY gone wrong.”
- Create a labeling system: Before removing anything, create a numbering system. Place a piece of painter’s tape inside each cabinet and on its corresponding door. Number them clearly.
- Take “before” photos: Document your existing layout, especially hinge positions.
- Remove doors and drawers: Unscrew hinges from the cabinet frame, keeping all hardware with its corresponding door.
- Remove all hardware: Take off hinges, pulls, and knobs. Store these in labeled bags if you plan to reuse them.
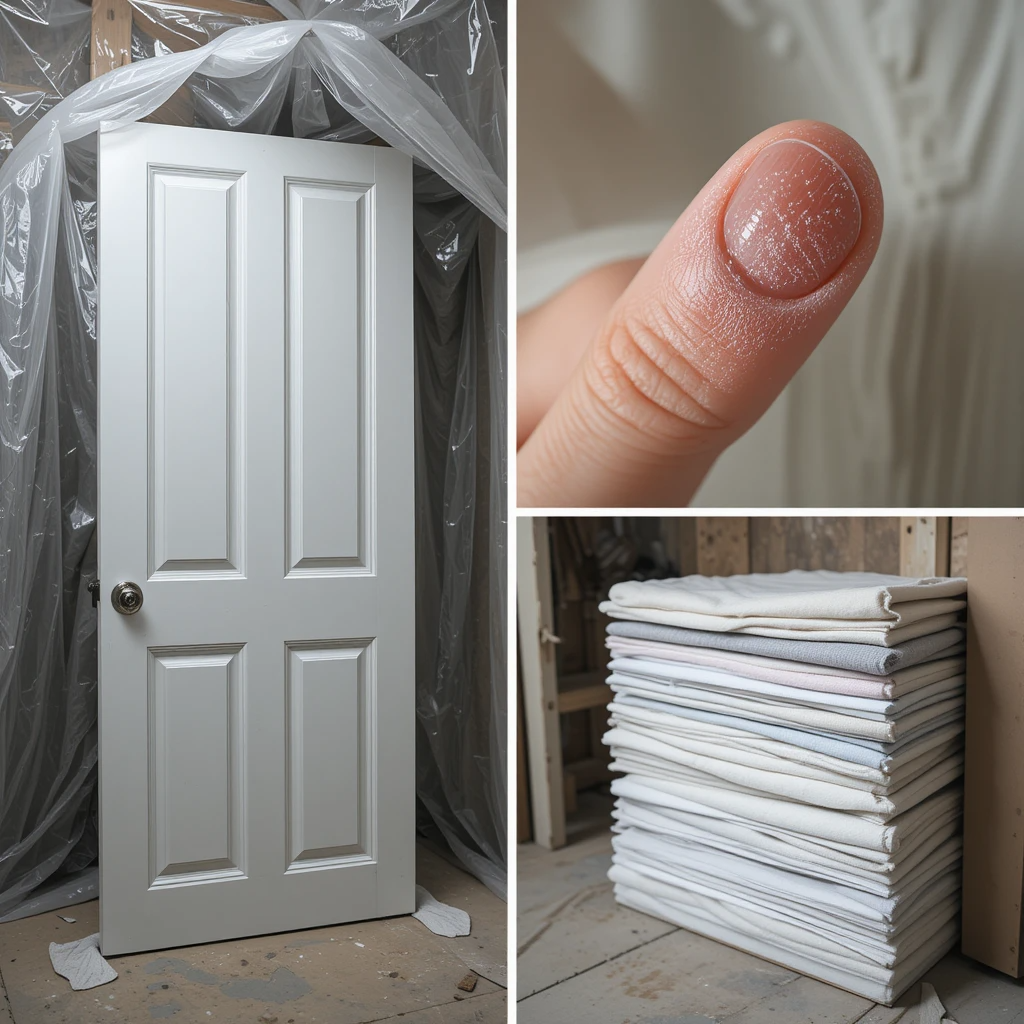
- Set up a workspace: Designate a clean, dust-free area (like a garage or spare room) where doors can lay flat to dry.
Step 4: Clean Thoroughly
Paint adheres poorly to dirt and grease, making this step non-negotiable for professional results.
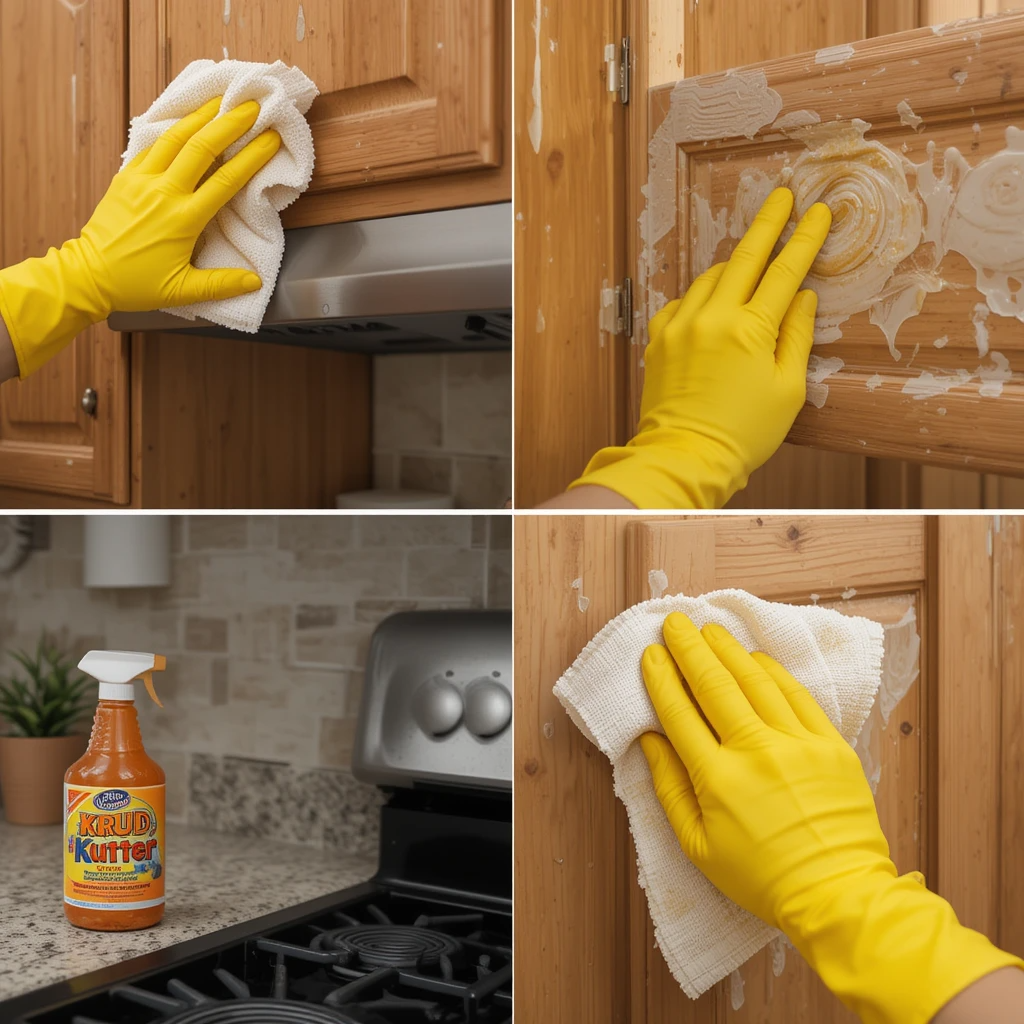
- Mix a degreasing solution: Follow the manufacturer’s instructions for TSP substitute or Krud Kutter.
- Clean all surfaces: Scrub cabinet boxes, doors, and drawers thoroughly, paying special attention to areas around handles and near the stove.
- Rinse with clean water: Remove all cleaner residue with a damp cloth.
- Allow to dry completely: Give everything at least a few hours to dry thoroughly before moving to the next step.
Professional tip: For kitchens with heavy grease buildup, you may need to clean twice to ensure all residue is removed.
Step 5: Sand All Surfaces
Sanding creates a surface that paint can grip onto, especially important for previously finished cabinets.
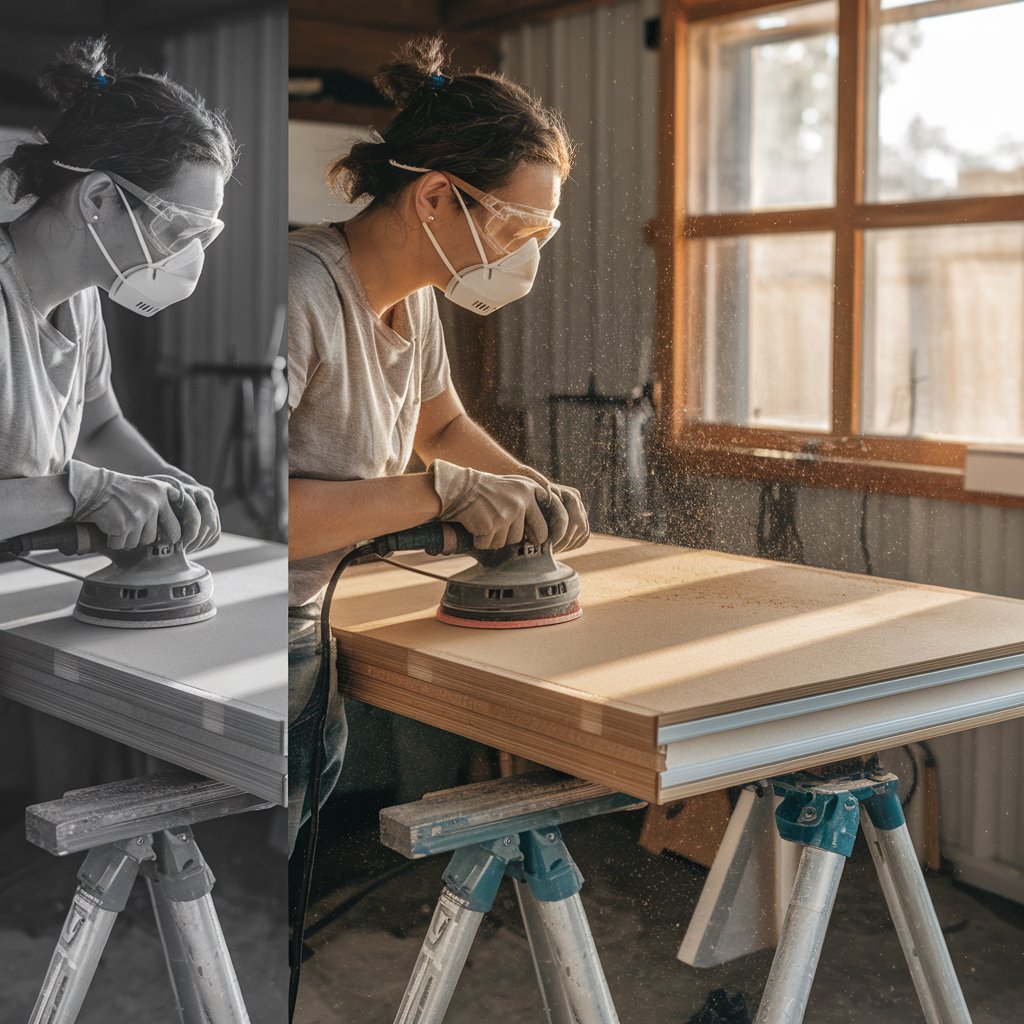
- Start with 120-grit sandpaper: Sand all surfaces to remove the glossy finish and create a profile for the primer to adhere to.
- Fill any holes or damage: If you’re changing hardware or repairing damage, now is the time to apply wood filler. Allow it to dry completely before sanding smooth.
- Finish with 220-grit sandpaper: This finer grit creates a smooth surface for painting.
- Remove all dust: Vacuum all surfaces, then wipe with a tack cloth to remove every speck of dust.
Remember: You’re not trying to remove the existing finish completely—just scuff it up enough for the primer to grip.
Step 6: Apply Primer
Primer is the unsung hero of cabinet painting. Skipping this step is a common mistake that leads to peeling and chipping down the road.
- Choose the right primer: For most cabinets, a high-bonding primer like KILZ Adhesion or Zinsser B-I-N is ideal.
- Apply primer to cabinet boxes: Using a brush for edges and a foam roller for flat surfaces, apply a thin, even coat of primer to all cabinet frames.
- Prime doors and drawers: Working in a dust-free environment, prime all sides and edges of doors and drawers. Start with the back side first.
- Allow to dry completely: Follow the manufacturer’s instructions for drying time, typically 24 hours.
- Sand lightly with 220-grit: Once dry, lightly sand the primer with fine-grit sandpaper and remove dust with a tack cloth.
Professional tip: If you’re making a dramatic color change (like going from dark wood to white), you may need two coats of primer for complete coverage.
Step 7: Paint Your Cabinets
Now for the main event—applying paint that will give your cabinets that professional, factory-finished look.
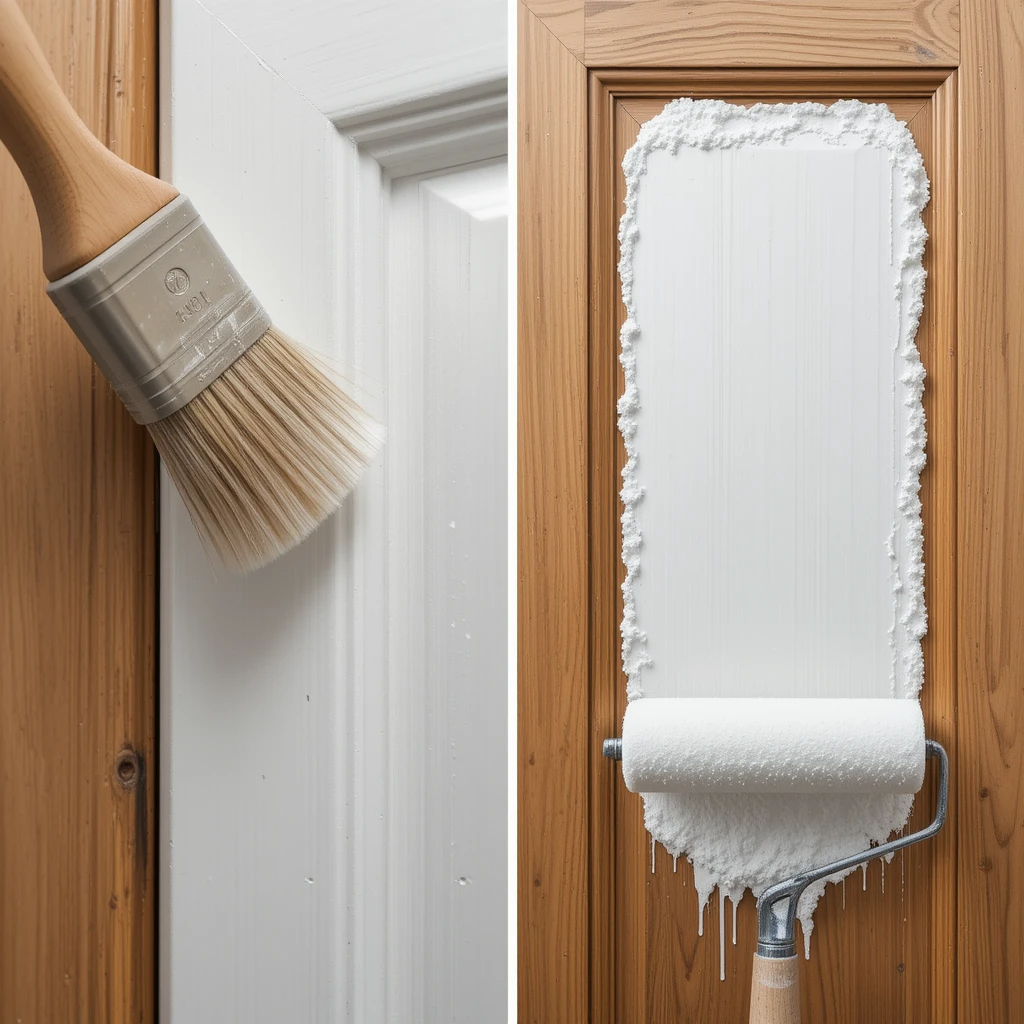
Brush and Roller Method:
- Start with cabinet frames: Using a high-quality angled brush, paint the detailed areas and inside edges of the cabinet frames.
- Roll flat surfaces: Immediately after brushing an area, use a foam roller on any flat surfaces for a smooth finish without brush marks.
- Paint doors and drawers: Start with the back sides, focusing on a smooth, even application. Use the same brush-and-roll technique.
- Allow to dry: Follow the manufacturer’s recommendations for drying time between coats, typically 16-24 hours.
- Sand lightly between coats: Using 320-grit sandpaper, lightly sand all surfaces and remove dust with a tack cloth.
- Apply a second coat: Following the same technique, apply a second coat of paint.
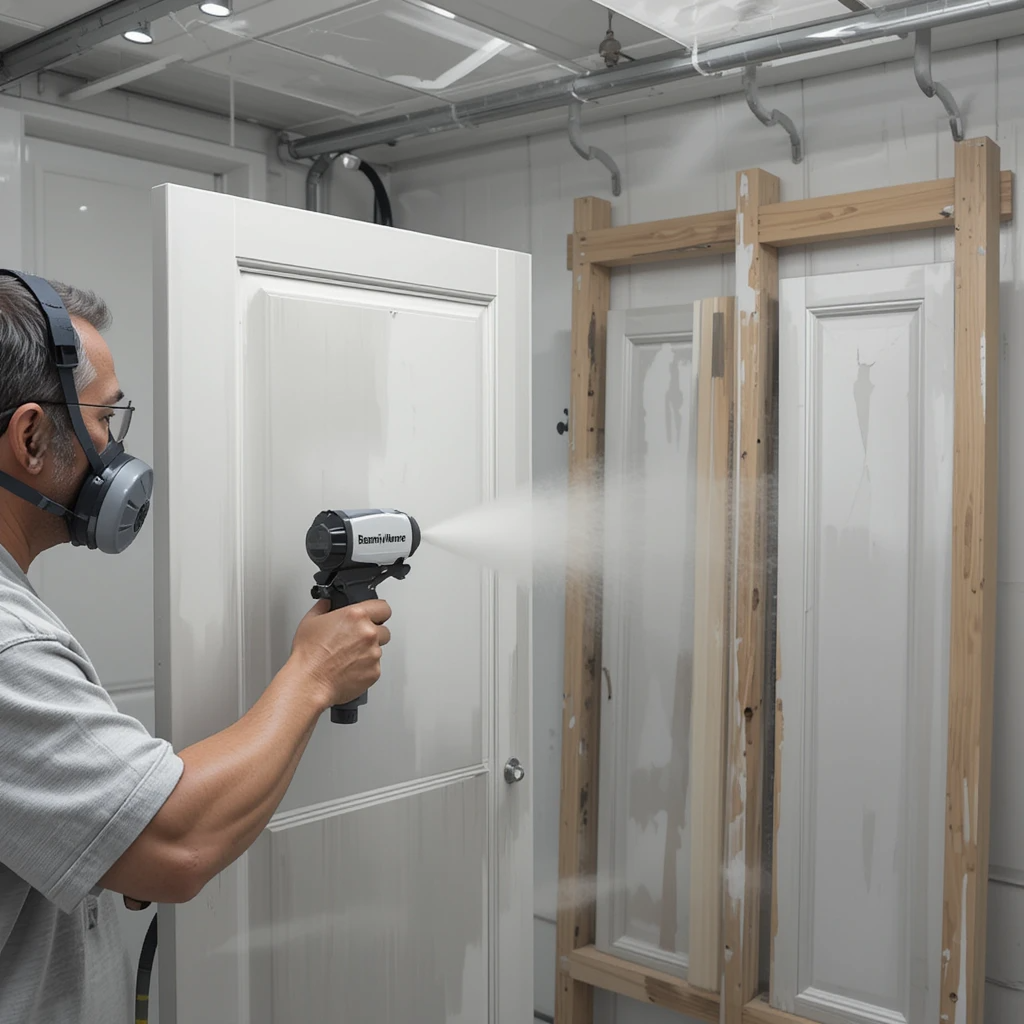
Spray Method (Optional):
If you have access to a paint sprayer and the skills to use it, this method provides the smoothest finish:
- Set up a spray area: Create a well-ventilated spray booth with plastic sheeting.
- Thin paint if necessary: Follow the manufacturer’s recommendations for thinning paint for spraying.
- Practice your technique: Test your sprayer on cardboard before tackling your cabinets.
- Apply thin, even coats: Keep the sprayer moving to avoid drips and pooling.
- Allow proper drying time: Sprayed finishes may require different drying times—check the paint manufacturer’s instructions.
Step 8: Apply Additional Coats
Most cabinet paint jobs require at least two coats for optimal coverage and durability.
- Evaluate after second coat: Once the second coat is dry, evaluate the coverage and finish.
- Apply a third coat if necessary: For darker colors or if coverage isn’t complete, apply a third coat following the same process.
- Consider a clear topcoat: For extra durability in high-use kitchens, apply a water-based polyurethane topcoat after the final paint coat has cured (usually 3-7 days).
Professional tip: Quality cabinet paints like Benjamin Moore Advance and Sherwin-Williams ProClassic continue to cure and harden for up to 30 days, becoming increasingly durable over time.
Step 9: Allow Proper Curing Time
Patience during the curing process separates amateur jobs from professional results.
- Follow manufacturer’s curing time: Most cabinet paints need at least 3-7 days to cure enough for reassembly.
- Avoid touching or cleaning: During the curing period, avoid touching the painted surfaces as much as possible.
- Maintain proper temperature and humidity: Follow the paint manufacturer’s recommendations for optimal curing conditions.
Remember that full curing can take up to 30 days, during which time the paint will continue to harden and become more durable.
Step 10: Reassemble Your Kitchen
The final step is putting everything back together carefully to avoid damaging your beautiful new finish.
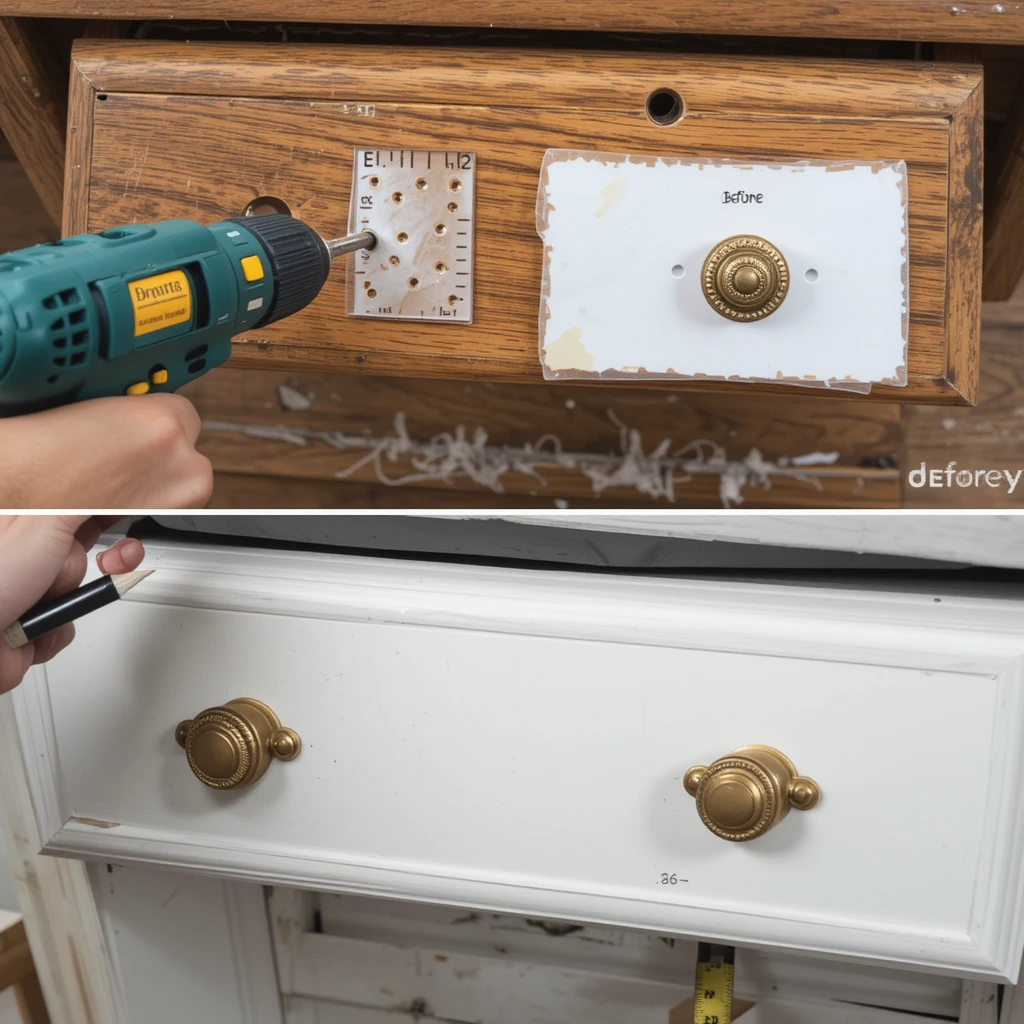
- Install hardware: If using new hardware, measure and drill holes before attaching.
- Reattach hinges: Use your labeling system and “before” photos to ensure doors go back in their original positions.
- Reinstall doors: Work with a partner if possible to avoid damaging doors during reinstallation.
- Make adjustments: Fine-tune hinge adjustments to ensure doors align properly.
- Install drawer fronts: Reattach drawer fronts and install pulls or knobs.
Troubleshooting Common Problems
Even with careful preparation, issues can arise. Here’s how to address common problems:
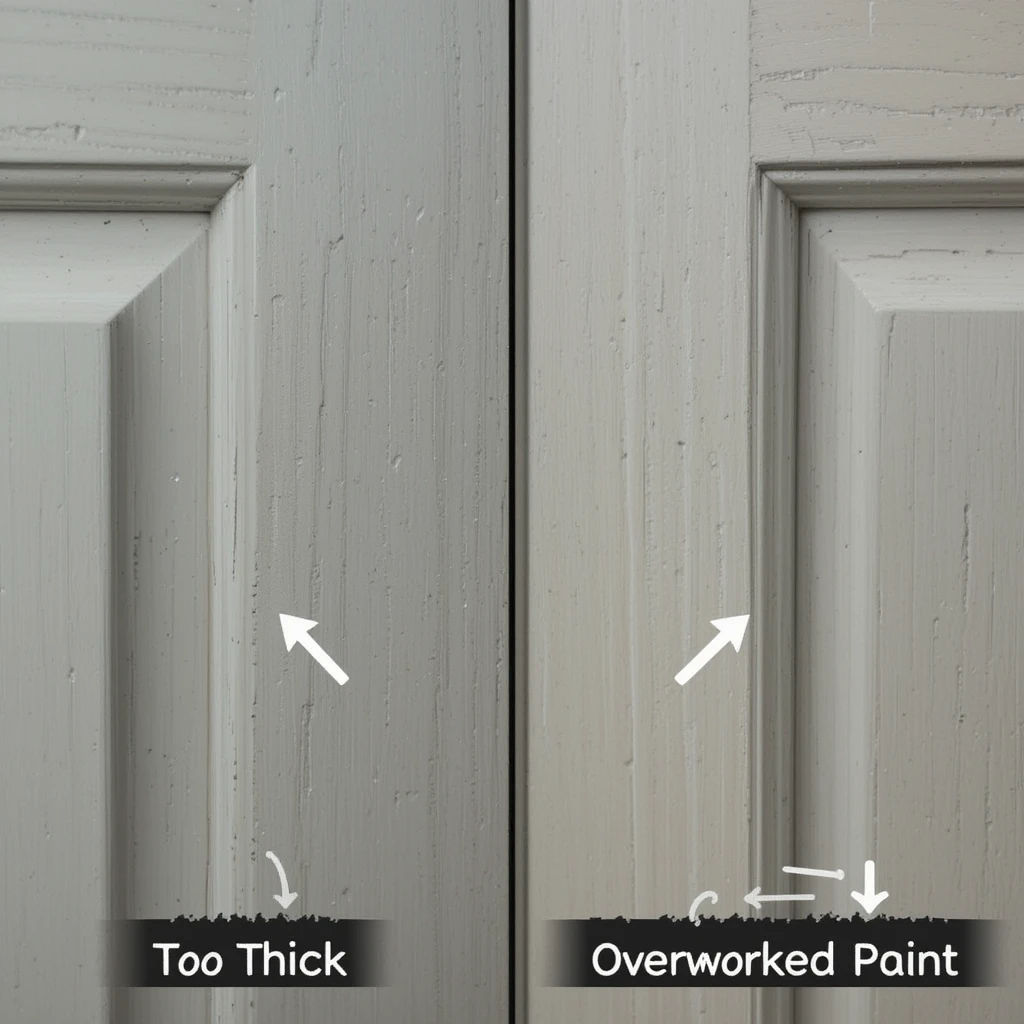
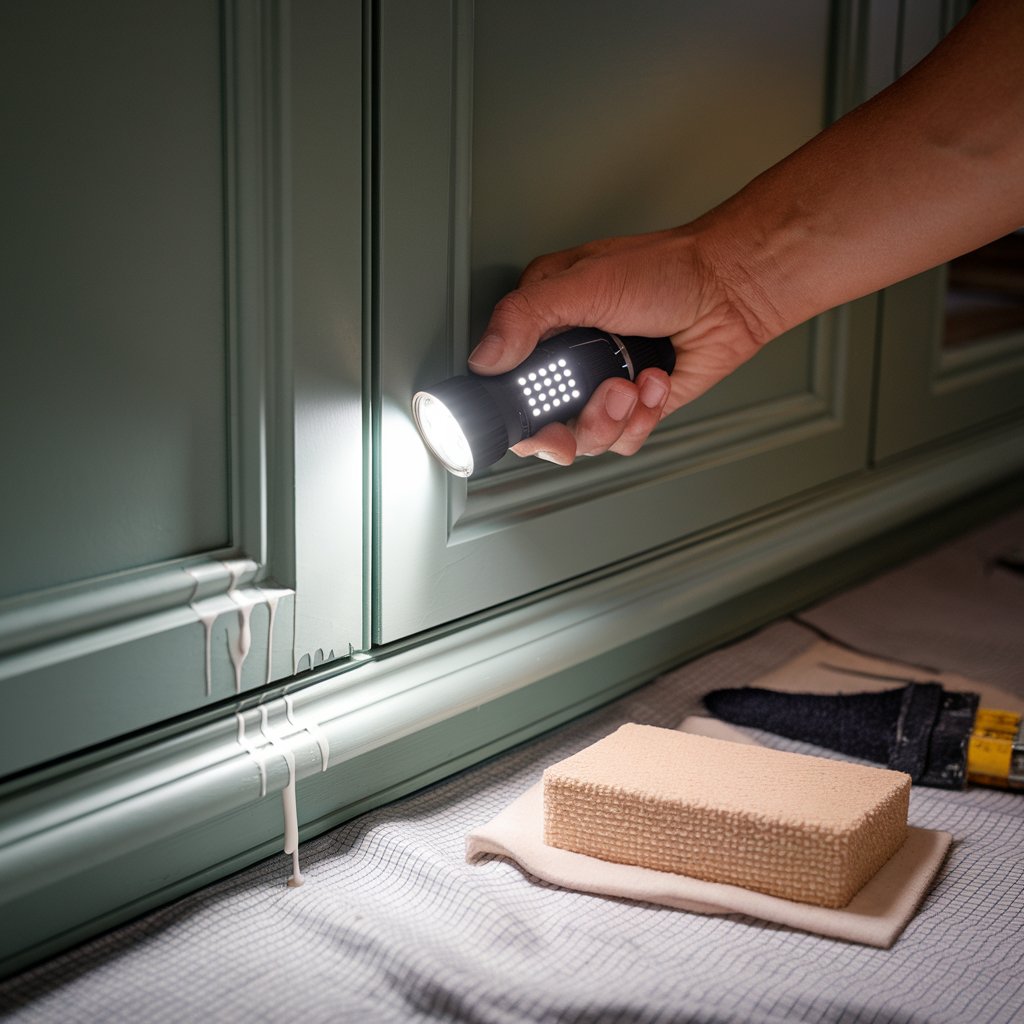
Drips or Runs
Paint has created drips or runs on vertical surfaces.Wait until completely dry, sand smooth with 220-grit sandpaper, clean with tack cloth, and reapply paint.
Visible Brush Marks
Problem: Brush strokes are visible in the dried paint.Solution: Sand lightly with 320-grit sandpaper, clean with tack cloth, and apply another thin coat using a foam roller or paint conditioner.
Peeling or Poor Adhesion
Problem: Paint is lifting from the surface.Solution: Remove loose paint, sand back to a sound surface, clean thoroughly, prime bare spots, and repaint.
Orange Peel Texture
Problem: Paint has a textured surface like an orange peel.Solution: This usually occurs with spray application. Sand smooth and apply another coat with proper technique or thinning.
Maintaining Your Painted Cabinets
To keep your newly painted cabinets looking fresh for years:
- Gentle cleaning: Use a soft cloth with mild soap and water for routine cleaning.
- Avoid harsh chemicals: Skip abrasive cleaners and scrubbers that can damage the finish.
- Touch up as needed: Keep leftover paint for future touch-ups of chips or scratches.
- Handle with care: Use cabinet doors and drawers gently, especially during the first month as the paint fully cures.
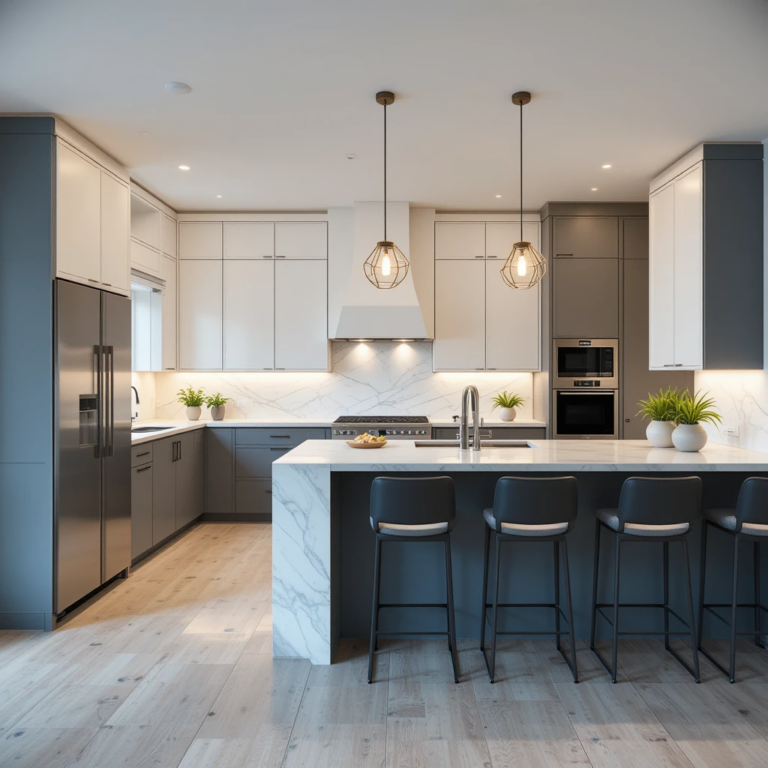
Conclusion: Enjoy Your Transformed Kitchen
Painting your kitchen cabinets is one of the most impactful and cost-effective ways to transform your kitchen. While it requires patience and attention to detail, the results can be truly remarkable—giving you a custom, high-end look for a fraction of the cost of new cabinets.
By following this professional-grade process, you’ve given your kitchen a new lease on life that should look beautiful and perform well for many years to come. The time and effort invested now will pay dividends in both enjoyment of your space and potential home value.
Have you painted your kitchen cabinets using our guide? We’d love to see your before and after photos in the comments below!
Related Articles:
Latest Kitchen Remodels in 2025: A Step-by-Step Guide
Pros and Cons of Open-Concept Kitchens: A Comprehensive Guide
7 Best Color Combinations for Room Paints to Transform Your Space


Этот текст на английском языке.
It’s great to see how MakeHomesCozy.com is leveraging the Amazon Associates Program to generate income while providing useful content. I wonder if they focus on specific home improvement niches or cover a wide range of topics. Do they also offer original product recommendations, or is it mostly affiliate links?